Sunday, January 30, 2011

Compression post. It's a deal

Compression post is in place.

I shaped the oak blocks needed to support the compression post where the cabin tops meets F89. Nothing really hard to do but it takes some time and patience to get those blocks right and perfectly leveled because there is not one single flat surface for them to lay on. And yes you are right if you thought "overbuild". Oh well, I guess that is becoming a trend of my boat.


Lots of angles, therefore lots of cuttind and sanding. Then once the block were shaped, it was time to epoxi them in place. Bubble level, square ruler to the rescue ! Never used those so much. And again for a slow guy like me, pacience and time until they fitted just right. It might look a little bit slanted on the picture but that is a camera effect. The bottom of those block is really as flat as it gets. And the compression post plate wich was welded on the pole will lay just flat on them.


Then really hight tech tools came into play. Such as this old pull up bar which I found in the garage . Just what I was looking for until those babies dried !


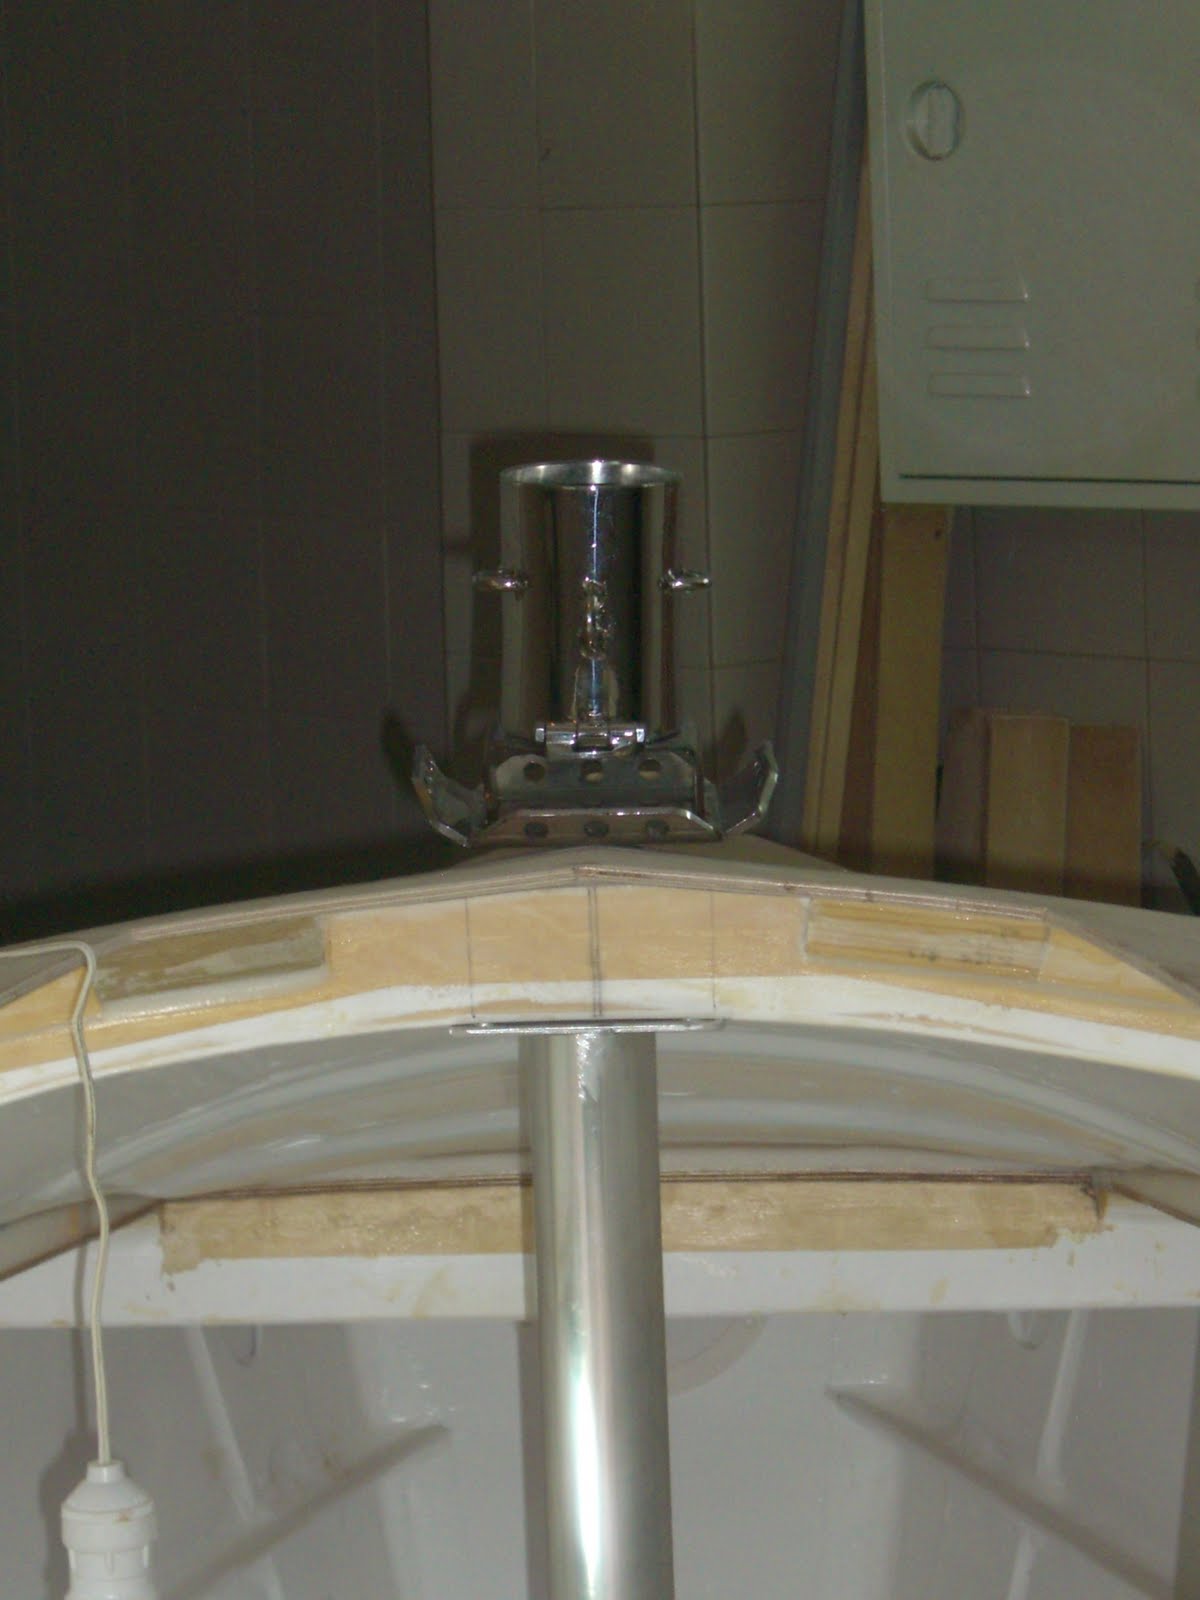
On the exterior side of the cabin top, I also glued the mast step. Again, it is shaped out of a block of oak. Actually, for all those reinforcement blocks, I cut strips of wood grain up and epoxied them together. That makes the sanding and shaping even harder because you go against the grain but it make them bullet proof.

The set up I decided to follow for my boat is too have the mast plate bolted all the way through the compression post plate. Again it took me some time to figure out which part to drill first, or to glue last. But I ended up sorting it out and got everything aligned and ready for epoxi.
Note: the screws shown on the pictures were used just to hold everything together for the picture. They were just inerted into much larger holes which I drilled from the bottom up with a super long drill bit. (Girls dream on !) Of course they will be substituted by stainless steel bolts.


Finally, I would like to add that there is really something amazingly gratifying about building something with your hands, a few tool, and above all no previous experience.
That's when you look at that tiny little bubble...and you know you did right. A magical moment where all efforts pay off.

I have to share that with someone because if I tell my wife I get turned on by the bubble she will kick me out of the house ! Hope she does not read my blog :)

Saturday, January 22, 2011

Early flip

I am stoked !

For whatever reason, I was not too sure my keel box and keel set up was perfectly aligned. I had this worry in the back of my head since I had finished the keel box.

So I wanted to check everything before gluing the monoblock cockpit sole. Indeed, in case the keel box had to be redone, it would be much better to rebuild it now than after having the cockpit epoxied on. Since I am building the long cockpit version, my cockpit sole will actually be supported by and glued to the keel box top.

So anyways, got a bunch of guys together and flipped the boat. First good surprise is that from what I can tell the hull and sides look good. The V is there all the way to the bow, the side panels are pretty much flat with no hollow parts and the hull bottom has a nice continous curve from stern to stem.


Then the really good news came in a while after. I slided the keel in the keel sleeve from the hull bottom (which was up) and came to the conclusion that....................the whole thing is pretty much perfectly aligned !


The keel protruded straight upwards and seemed to be symetric from all angles. What a great sight ! And here is the proof that I am a happy camper today. Building this i550 has really been an enjoyable adventure. Can't wait for the sailing part of it !

Now that I know my keel box is all good, I will move faster than before and glue the cockpit sole until next weekend. Still have minor issues to solve regarding all the hardware reinforcement plates i am placing underneath it.
Although everything was pretty much good news today, I found out a spot on the hull bottom where the plywood is delaminating. Looks like only the last layer is popping up. Should be easy to fix.


Its a bugger but I will not loose much sleep over it........at least certainly not as much as I did before being sure my keel assembly was ok !

Saturday, January 15, 2011

Cabin top trimming

As described in previous post, the cabin top interior gave me some work to finally make it look good. The reason is that because of all that plywood flexing and compound curves, the sides of the cabin top actually flared out and up. This behaviour of the plywood left me with a reasonable gap between deck panels and cabin top side panels which I partially filled with some wood.

After a long period of meditation inside of the cabin (does that count as building hours ?) the rest of the trimming was done with my Multimaster and a respectable amount of epoxy-silica putty.


A good amount of time later, the interior of the cabin finally looked the way I wanted !

All I have to do now is round off the edges and laminate with strips of fiberglass the cabin top sides to deck joints.
On the exterior of the cabin top to deck joints, I laminated kevlar for strength..................


...............and used a "house special" of West silica + filetting blend + fairing filler putty to achieve a smooth transition. It is now smooth to the hand and to the eyes.


I enjoy mixing up and combining different fillers. In this case I wanted the strength of silica with the smoothness of fairing filler with ...............Well heck ! I cant remember why i used the "brown stuff" again.


Oh yeah ! That's because I have a can full of it and I want to get rid of it but feel too bad to through it in the garbage. Please note however the nice brownish color it gives to the whole thing.... :):)


Thank God I will paint my boat top white !

Compression post and mast foot base

The compression post I am using comes from a broken hanglider I have around. The tube is doubled and made from aeronautical grade aluminium. Pretty light and bomb proof.


On both ends of this tube I have welded a plate wich will be bolted to the compression post reinforcement blocks I have epoxied at the bottom and top of F 89.


I also left about 1,5cm of tube sticking out bellow the plates because I wanted to rout a thin circular channel on the reinforcement blocks, top and bottom, into which the 1,5cm tube would fit.


The idea was good but now that I have the actual tube with the plates, I dry tested the concept and found out that I have not enough space inside the cabin to properly position the tube as I intended. I guess I will cut this tube flush to the plate and will not rout anything !


Anyways, with or without that tube sticking past the plates, the top plate will match the holes of the mast base. Therefore, I intend to have 4 single long bolts holding the mast base through the cabin top, through the compression pole reinforcement blocks, and finally through the compression post plates. The whole assembly should come out solid.


Talking of which, here is a picture of the mast base I will use on my boat. I have to admit that I did not do it (I wish !) . The part was built by a great guy, boat builder, mast rigger, sail expert I finally got to meet here in Turkey. Home base for me for all the technical / metal parts I was wondering how to do !


It is a great looking piece of heavy duty stainless steel and it pivots to fold the mast down which will come in handy for transportation. The mast section I will use is the best profile I could find down here. A bit larger and heavier than the Aussies alu rig or the Americans carbon wonders I reckon.

Mast base as seen on another boat :