Saturday, May 15, 2010

Cabin - or how to add compund curves to plywood

The cabin is another enjoyable part to build.
First it is rather large. Second it really changes the appearence of your boat. Finally, it is interesting to see how much bent that plywood is capable of handling !
To be quite honest, it is so much bend and twist that I did it over a few days, letting the plywood rest somehow and assume its final shape without too much stress.
This is how I did it:
First thing I did was do simply lay out all panels to have a sense of the work ahead. It was obvious that some force would be necessary to close that thing alltogether...!


Then I started working the middle panels. That bent is rather simple and straight forward. Moreover, it is not compunded so the plywood does not complain too much. I used hight tech weights (straps and stones !) to get those panels in shape and stitched them progressively from back to front where the tension was much greater. I let them rest overnight.


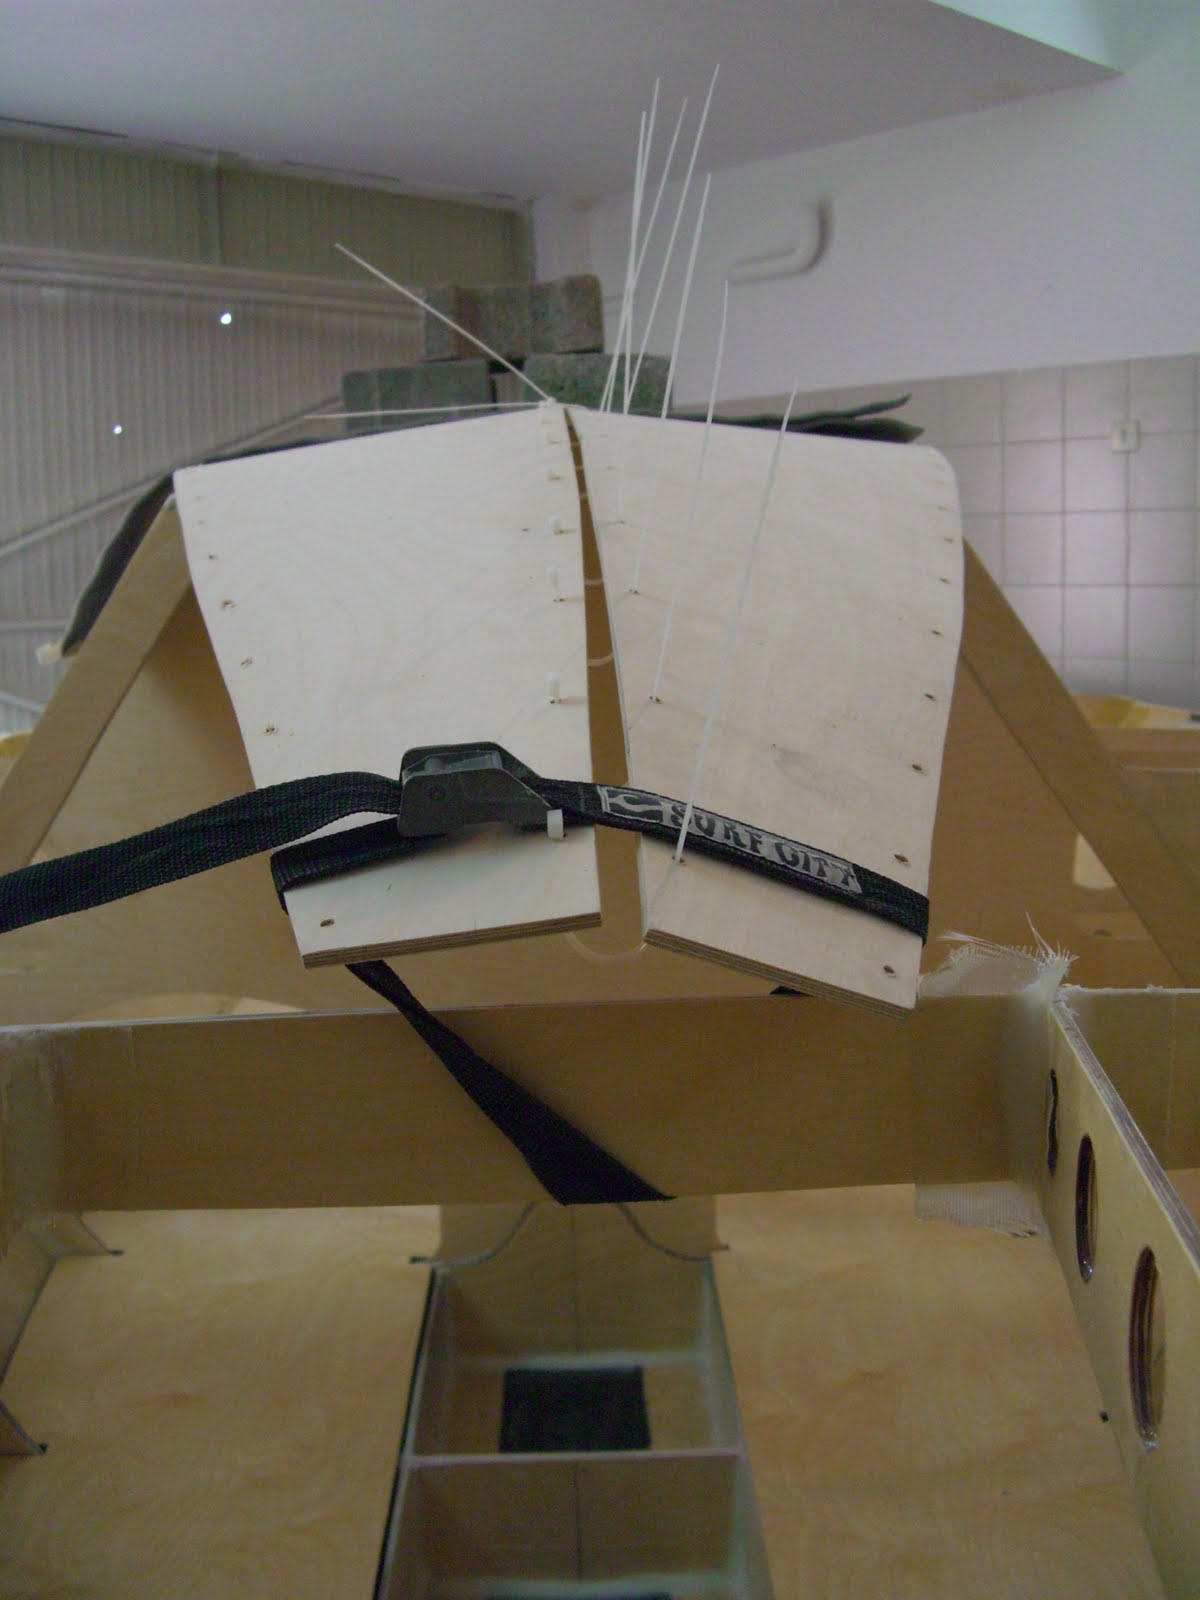
On the picture on the left, you can see the weights used. The panels are not yet fully stiched but holes were pre-drilled and that worked fine for me.


Once everything was pretty much stiched all together, I was confronted with the challenge of adding a compound curve at the tips of the cabin panels to make them fit flat on top of f53.5 .
A significant gap (below) would have to be closed.....So I once again left everything rest overnight.


The next day I started bending the front of those panels with two pieces of wood (placed above and underneath the tips) and clamps.
10 mns torturing the ply and all panel tips were flat without any cracking sound.
I temporarly screwed them to the two pieces of wood and micro-fileted all panels from above and from below with epoxy thickened with microfibers, without yet removing any zip ties.


What I also did to absorb and hold some of that front panels tension was to add 2 strips of plywood on the underside of the cabin, across all front panel tips.

Those arched strips have pretty much an opposite force to the panels tips and help a lot to hold all of that tension.

The voids that you can see on the picture (top is upside down) are actually from some bad trimming I did. At one point forcing the panels down, I had to trim the panels inside edges because they were overlapping. So I cutted some of what I considered to be excess plywood.. (!?) After, fully flattening the tips, I ended up with gaps between the side panels... :(
This is not so bad though as a large part of this cabin front will be cutted to perfectly fit the boat. The cabin top is indeed a little too long and will be shortened about 2 inches length wise.
In addition whatever gaps leftover can easily be filled with a mixture of epoxy and microfibers. It is a tough putty once it dries !
If I had to do it again, however, I would have started to flatened the tips, then released some of the tips zip ties to avoid the panels to overlap, then kept on flatenning the tips without doing any trimming.

The cabin top looks now really solid. I might just laminate some carbon on those cross-stringers to make them even stronger.

Bunks time

Also worked on the bunks.

The pretty interesting thing about those bunks is that they were the first pieces I cutted out of the plywood sheets I had bought when I started building the boat back in February.

The reason I started with those pieces is that was I wanted to get used to my powertools cutting something rather simple. The bunks seamed to be a good option. They are non structural parts and do not have any major function except laying on top of the hull stringers. Precision cut on those parts is not that much important since they will be hidden inside the cabin or underneath the cockpit sole.


So in other words it does not really matters if they do not come out 100%.


Well , to my utmost surprise they pretty much fitted right in ! That confirmed me 2 things : 1/my hull is symetrical and pretty much according to plan. 2/although my first cuts using the circular saw were not all that great, they were not too bad either.


All was need was trimming to allow for the frames to fit in. It is a time consuming task since you have to place the bunks in, see and mark what needs to be trimmed, take them out, trim, place them back in, see what needs to be trimmed.......and again, and again.
You will go over this process quite a few time to get it right but it is rather an enjoyable task.
On the pictures the bunks are placed but not yet laminated. I will do this later since, at least for the forward ones, i need to finish the keel box first.


For the first time builder like myself, here is a piece of advice :
when you start your build, dont go over excited and start out by cutting hull panels or frames. Yes they are really nice parts that give you a clear sense that you are building a boat, but start out with something easier if you dont have much experience cutting wood or using power tools .
I suggest you cut out your bunkers before anything. They are easy to cut, not too relevant to the built so you can afford not being super precise, and will give you a nice training for the larger and more sensitive parts.

Boat identity


That is just in case any one comes in my garage and ask me what I am building.....It is just holding with pins right now on the face of f18 but will be laminated later . I will do some tests before to make sure the printing ink will not melt away with the epoxi.

I think it looks pretty nice...


On the picture you can also see the stringers I have added for deck support

between f53.5 and f18. Those are really simple 1/4 " plywood strips with lightening holes. I thought about making them as I beam but came to the conclusion that they would probably be way overbuilt.

So I just went the easy way.

cockpit sole support


I am having fun playing around with different alternatives and techniques.


So for the cockpit sole support between f124 and f169,5 I decided to build an I beam like Tim Ford used on his boat.


It is pretty easy to make, looks good and is really something out of this world as far as strength...You can just step on it and jump, nothing will happen. I guess it will also add a lot to the distribution of forces around the keel box.


The I beam was fully fileted and taped following what are now becoming standard procedures. I have also used 5 mns epoxi at the beginning to set the Ibeam all together before fileting.