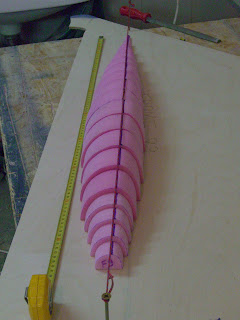
I bought a block which is just 5cm thick which is perfect for all sections except the first 4 which needs to be 2,5 cm. For those thinner sections I used a thinner foam sheet which I glued in layers until I got approximatly the desired thickness.
Please refer to Kevin's (PipeDream) great post on keel plug building on the forum under Building > Foils > "Keel bulbs...info and how-to's".
There you will also find a pdf from Chad Knot racing which clearly shows what are the 20 section. If you are not carefull you will end up with 19......just like I did !
Cutting the pieces out was really extremely straight forward.
First I cut out the templates I had printed one by one. I then used a marker to mark the contour of each piece on the foam blank. I marked the wide point line on each piece which gave me a usefull reference to align all pieces later. I used my jigsaw with a longer blade and cutted all pieces. Used a block sander to do minor adjustments since the pieces were cutted pretty precisely with the jigsaw.
Piece of cake !


Than just to make sure they were perfectly aligned I pulled a string above the keel plug, across two screws that were placed at both ends of the plug.
Then looking straight down from above I align the widest point marks with the string. Not rocket science but it is simple and it works.
And just as a teaser of what's coming next, I dry fitted the cockpit sides. Those were cutted from o cardboard template I made but that is a story for future posts.

I am off to Brazil for 2 weeks of vacation....so the build is on hold until I come back !
.jpg)


.jpg)
No comments:
Post a Comment