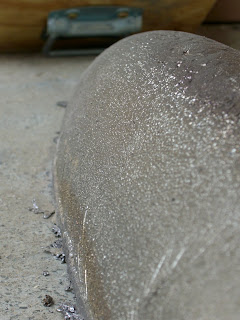
The bulb is done.
I did not have the right tools to do it at home so I went to a metal shop that was willing to help me.
It was quite an interesting experience with about 6 guys working all together trying to get all those 80 kg + of lead melted. They, themselves, didn't quite have the right equipment so we ended up using a large inox recipient that was handy and a massive blowtorch.
We melted a little over 40 kgs of lead for the first pour and it took some time to get really liquid. Lead tends to cool off and harden pretty quickly.
Then we poured one full keel halve at once. The lead was boiling inside the mold and I thought the whole thing would just melt down.

Indeed, on the first halve, the lead close to the mold walls started solidifying before I had placed the wood keel recess . So we had to use the blowtorch on the mold to melt those sides. Than I got really scared that the mold would not take the heat. The edges of the mold turned red hot as we melted the lead to free space for the wood spacer. But it held great and did not desintegrate.
As a matter of fact the molds are just still absolutely perfect. I can give them away to the next builder in Turkey but they are just to damn heavy to be shipped anywhere !

For the second halve, we place the wood spacer before pouring. The lead was boiling like water and the spacer started smoking immediately as we poured. Stange fumes from lead, ciment , wood and epoxi filler were coming out....I am really glad I was using my organic respirator !
That is what the spacer looked liked afterwards. It is made of oak (as the rest of the keel is) and ended up splitting in the middle because of all the heat. I believe a weaker wood could have caught on fire. And maybe I just left the spacer in too long. Anyways, you can see the picture a metal plate and small wood pieces screwed at each end. Doing such assured me that the spacer was in just at the correct place and depth. We just clamped it on the mold. No need to push the spacer down by hand.

But it all came out great. The inside (upper surface) of the bulbs do not look so good but the outsides are really great and will only require minor fairing.


One halve weights at 41,8 kgs, the second at 39,6. Total 81,4kgs. I still have to trim them, take some excess off and drill the holes for the screws. Final weight will be very , very close to the 80kgs as defined in the bulb project.
Two little details that made a world of difference:
1 /I made individual molds. They were already heavy before the lead got in, and they got 40kg heavier after we poured. Overall each mold and lead was about 65kg. It would have been almost impossible to work around with one single mold of 130 kgs.
2/ I put little handles on each side of each mold to make it easier to move them around. I thought about it the night before the lead was poured in and I am glad I did because it would have been really difficult for me to do anything without those handles.

.jpg)


.jpg)
Hey Slowpoke, thanks for the comment but guess what ? You are actually the guy who inspired me to finally get that lead melted ! I read your blog and suddenly felt the urge to finish once my bulb. Drilling out the holes for the bolts is the next challenge.
ReplyDeleteGreat work Jerome!! It looks really nice. Remember the milk when drilling the lead. I'm told it's the best thing to use. That and a gentle hand on the drill.
ReplyDeleteFor those following in your foot steps, one thing you can do to help protect your spacer is to soak it in water before you pour the lead. Yes it will steam and hiss but it will stay together a "little longer". Mine didn't look much better than yours by the time I pulled it out of the 2nd half though. Jeff used a glassed cut off from his keel foil and it endured the molten lead a little better. That's what I get for cutting mine to length before glassing it.
Cheers, Kevin.