Tuesday, September 20, 2011

Hardware and foot straps


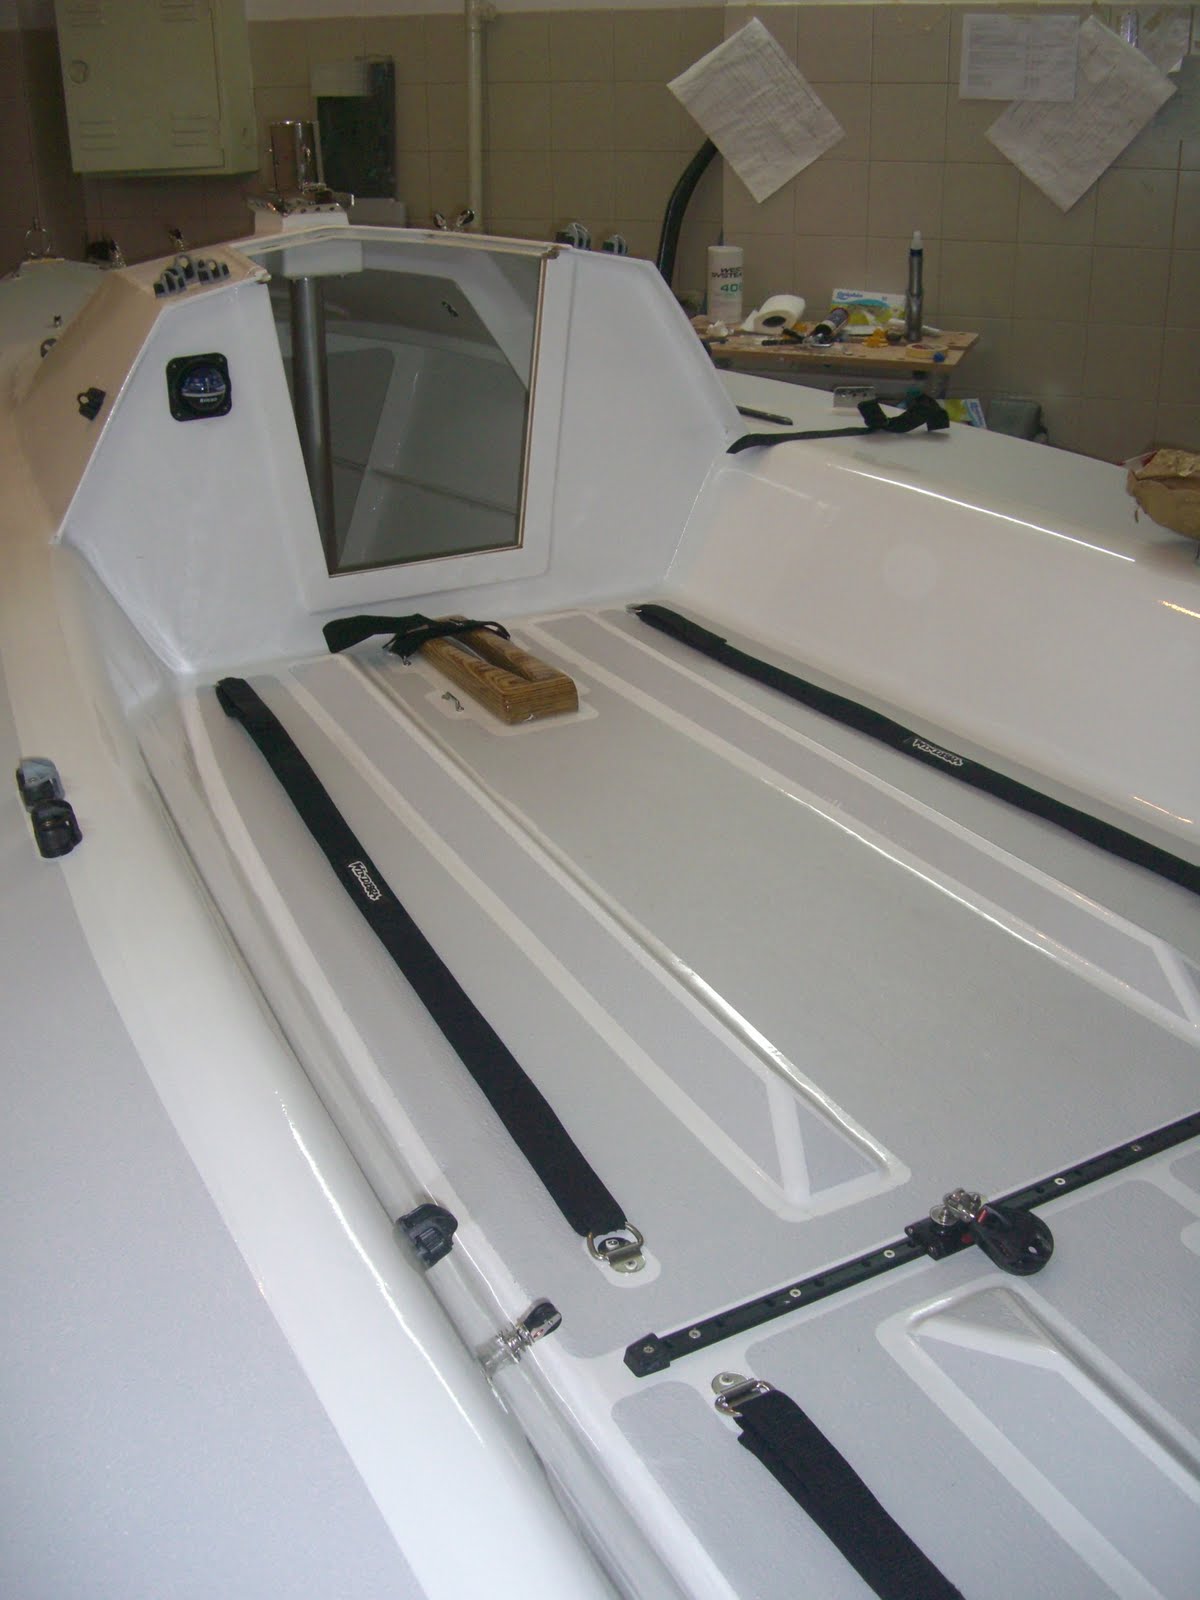
Here are a few pictures of the boat with hardware and hiking straps installed. I am stoked !

Still need to install the rudder plate to consider the boat fully finished. But I am really close....and have a hard time grasping what it means......

What an adventure ! Stop thinking, build !!!


That is the strap adjustment. Simple velcro with 20cm on each side. Gives me plenty of adjustment length to play with the strap height.
I will most likely to play around with bungies to leave them at the right height to facilitate sliding my feet underneath them, but I will leave this fine tuning for later, that is after splashing.


And this is how they look when their height is set up to minimum height, flush with cockpit sole.

Wednesday, September 7, 2011

Kiwi Grip


I am finally really getting close to finishing off the boat, just a few things more and I will focus on setting up the mast (which is done and beautiful !) and getting the sails cut.

So one of the last finishing touches was applying the anti skid paint and i choose to use Kiwi Grip because of all the good things I heard about.
I bought a can of white, which was the only color available in Turkey, and custom colored it to a light grey using a small amount of water based pigment as recommended by the Kiwi manufacturer. 5 minutes on the shaker at the paint shop and my custom grey was ready.

Then I took my time to tape all areas I wanted to keep in the original Perfection White. That is a lot of masking tape !
But the real work was to round off ALL corners. I mean all of them, except the ones I forgot, were rounded off using a large washer as a guide and my cutter.
It was an enjoyable task to do and kept my mind busy for a while, a bit like assembling a puzzle.

Kiwi application was very easy and straight forward. I just use one of the plastic squeegees I had left over from all the epoxy work, threw it down in patches were I needed it, spreaded it all around to achieve a uniform thickness, than gave it its texture using the special roll. More than the force applied to the roll, I found out that it is mostly the amount of gooey you lay down that will change the final texture.
On my boat, I went for a smoother texture on deck sides, where my butt will be, and for a more aggressive texture on the cockpit floor.
One issue I faced, which is worth mentioning, is that in the areas I took too long to remove the tape after applying KG, the tape itself ended up melting down. I mean it started to disintegrate under the Kiwi chemicals, become very soft, and mushy. And I am talking good quality blue tape !
İ removed about 90% of all the tape while the Kiwi was still fresh, but on one of the benson where the tape had been left for about 20 mns, İ only managed to peel off the top of the tape yet the glue and part of the tape material stayed on the benson.

A second of panic (!!!!!) just to think about the possibility of screwing the whole thing up.....and then İ decided to leave it as it was and remove the blue tape left over the following day,after the bordering Kiwi had hardened.
Next day, with a little acetone and finger nails scratching, I removed the blue tape that had been left behind. Thanks God my anti skid paint job was safe. And it looked really sharp !

All that time patiently taping the boat paid off. I really dig the round corners and the white and grey color scheme. Check it out


Tuesday, August 23, 2011

Stainless Steel Shine

Here are a few picture of the bow piece and the rudder plate I will use on my boat. It is all heavy stainless steel. Probably too heavy for most of the racers out there. But I like the shine and glow of those parts.

The bow piece is simple and as you can tell the spi pole will go though it. Might not be class legal because my forestay attachement will stay above the ring and if you project it forward , it will actually meet the deck level forward of bow.
Oh well ! Until another i550 gets build to race me down here, that is what I will have on my boat.

The rudder plate is very straight forward but very cool. The rudder will be pined down by a long rod inserted through the 2 transom and 2 rudder heavy duty gudgeons. The pin is then pushed down, compressing a spring, and hold underneath a hook which is itself welded to the plate.
Should hold well any force applied on the rudder itself. I would be very surprise if those fail before the rudder do.
Shine on....

Non skid taping


Here is a short update on what I have been doing. Boat is almost finished and one of the last building steps will be applying the non skid.

I bought a can of white Kiwigrip which I custom colored to a light grey. Then I masked the boat with blue tape.
That is a long but amusing job to do as it gives you a chance to visually check out for the boat symmetry
.

Still some more taping to do, mainly rounding off the corners of the masking tape, then some sanding to (unfortunately) rough off that glossy Perfection surface, and I ll be ready to spread the Kiwigrip all over the boat. As a matter of fact I really do mean all over as most of the surface will be painted over.

No matter what though, I will leave that keel support as it is because I really dig its zebra look.

Friday, July 22, 2011

upper deck is painted


The upper half of the boat was finally painted. Again I used Perfection which I believe is a pretty great paint.
This time though I did not thin and did not tip. I just rolled it with a West roller made for applying epoxy. They work beautifully for paint....and the final result is really good. The paint really levels out great, no roller marks.
The cockpit side panels and the round transition received 2 layers of paint and so did the sides of the cabin house. The rest pretty much got one single layer for which I did not try to achieve full opacity as they will be covered up later with grey KiwiGrip.

I think I could have pay more attention to detail and done a better job on fairing those cockpit side panels. I might layout another layer on those panels and try to give them some texture to hide out some of the not so fair spots....Or maybe I will use Kiwi in the sides as well.....I will see that soon.
I am now off to Brazil for a well deserved 2 weeks break....I will dream about my boat (for sure) as there is little else to do before splashing.

Thursday, July 21, 2011

Chain plates in

Figuring out where to place the gussets was one thing, but actually bolting the chain plates on those gussets is a whole different story....
Days in Turkey are currently really hot, so working inside that tight cabin trying the correct way to drill those holes on the gussets as close as possible to the shear clamp was not easy !


After I had mark the precise location of the chainplates, I used my Bosh Multimaster to cutout the upper deck. That tool is just wonderful and I could not have done it without it.
The place around the gussets was so tight with the frame and decks and hull and all....that i could not fit my driller properly in order to drill the holes.

What really saved me this time is a little gizmo I bought that allows you to drill perpendicular to your driller. That is quite an advantage and I also used that gizmo to redrill some hardware hole from below deck.
The holes were then filled with thickened epoxy and the bolts were tight. I did not use any release agent on them so I hope I wont have to remove the chainplates any time soon.

I guess I could have tried to place the chain plates further towards the shear but that would have implied working even closer to that gusset-frame-hull tight corner. And that would have been simply impossible to do with the kind of straight down chain plates I made. The design of the chainplates would have to be changed.
And I leave that decision for the next builders cause I am done with my chainplates !

No matter what, the final assembly looks really sturdy and I believe the boat could easily be lifted from those chainplates. The chain plates themselves are made of 5mm stainless steel, 8cm by 17 by twenty something as I recall.....They were bolted through the gussets with 10mm stainless steel bolts.

Sunday, July 3, 2011

deck faired


Deck is finally faired, sanded and ready for painting !

İ followed the exact same process as for the hull :
1-faired all cloth seams and overlaps with a thicker mixture of resin + West Microlight 410 fairing filler. İ used a medium size plastic squeegee and made sure no bumps were left behind and everything was flat to the touch.
2- after sanding the initial putty, İ applied a thickned float coat all over with an even large squeege and left a thin film of resin just enough to cover up the cloth weave. Actually İ used a large metal spatula. İ had to round off the corner of that spatula as not to leave any scratch on the fresh float coat but it worked a wonder leaving a smooth thin film of thickened epoxi.

Then came the dreaded fairing time..... Except this time İ have to admit i did not kill myself handsanding with the longboard. İnstead İ went with my large orbital sander and 80 grit dry paper ! That went fast ! But İ was carefull enough not to oversand. The main reason İ did not use the longboard is that İ did not intend to obtain such a flat surface as İ did for the hull. No need for that since most of the deck surfaces will be overpainted with Kiwi Grip which will certainly mask any imperfections. Another reason is that it is impossible to use the longboard for the cabin top or even for the cockpit floor because of the bensons İ glued.
So İ just started with the sander.....and finished the job off with it. İt looks good, no apparent flaws to the touch.

One thing İ did before fairing was to drill all the holes for the hardware placement. And to make sure İ would not loose sight of them (which apparently happened to other builders) they were all overdrilled and filled with blue colored epoxi. İ used small amounts of a special epoxi coloring agent. İt worked out great as all filled holes were still well visible after applying the float coat.

İf you zoom on the below picture you will see the blue marks for the jib rails bolts .


After sanding the float coat, İ pre-drilled all holes . Now İ am pretty sure İ will not loose them even after painting.


Next steps are primer, paint and anti slid Kiwi Grip. İ also have to repaint the interior cabin and fix the compression post but there is not much to do before İ can turn my attention to mast and sails.... :):):):)